
Kale and other vegetable chips
So who hasn’t tried kale chips yet? Seems like everyone is talking about kale these days.
I guess it’s like anything, you need to be game enough to try something new. Once you have and decided that you like it, it becomes a new inclusion in your repertoire.
I actually prefer the taste of spinach in most recipes, so it took me quite a long time to try kale chips. I’m glad I did now though, they are definitely a yummy alternative to ‘regular’ chips.
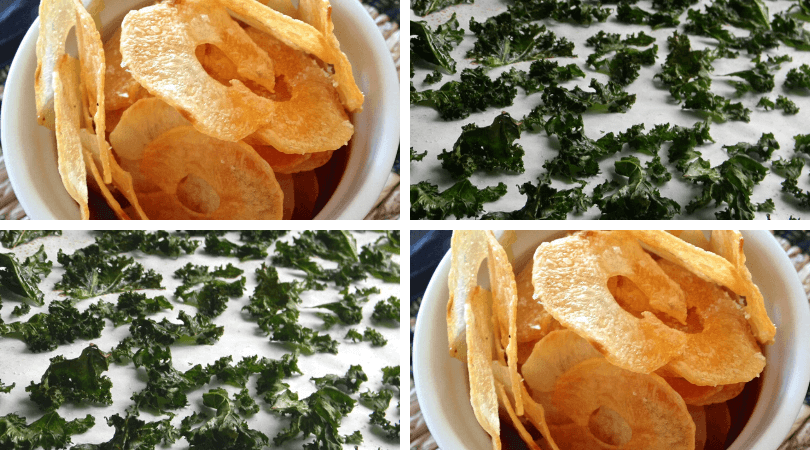
Roast veggie chips are delish too. We often make our own potato or beet chips. The veggies do need to be sliced thinly and uniformly, so use a slicer and watch your fingers!
We use our spiraliser for potato or beet chips. It gives the chips a hole in the middle, but they taste great, so we don’t mind how they look.
Get more healthy snacking ideas here: 11 EASY HEALTHY SNACKS and 17 HEALTHY SWAPS
You’ll find plenty more simple, flavour-packed recipes here on my blog that work beautifully for post-menopausal bodies.
If you haven’t already, I recommend grabbing a copy of my free Post-Menopause Breakfast Makeover.
Your body responds differently now to food, stress, sleep and movement, so the old “just eat less” rules don’t work anymore.
The Makeover Guide shows you how to build satisfying breakfasts that support your post-menopausal body, for sustainable weight loss.
You can read more about it here:
Post-Menopause Breakfast Makeover
Or click the button below to dive straight in.


VEGGIE CHIPS RECIPE
Ingredients
- 1 bunch of curly kale
- 1-2 tbsp Olive oil, or use a spray
- Sea salt & cracked black pepper
Optional seasonings
- Lemon juice, paprika, chilli flakes, or your favourite herbs/spices
Instructions
- Preheat oven to 140 - 160℃ and line two baking trays with baking paper.
- Wash and thoroughly dry the kale. Tear the leaves into small pieces.
- Spread the kale leaves out in a single layer on the baking trays. Lightly coat with oil and massage into the leaves.
- Sprinkle evenly with salt, pepper and other herbs or spices as desired.
- Bake for 10 - 20 minutes, until crunchy - the edges should be slightly brown, but be careful not to burn them.
Notes
Nutrition per Serve
NUTRITION NOTE
Nutrition information should be used as a guide only
Don’t forget to pin this recipe for later!
